In order to access any printer or scanner from a Mac computer, it first needs to be added in System Preferences->Printers & Scanners before it becomes available for use. This lesson assumes your printer / scanner has already been set up, and is available for use.
Perhaps the manufacturer of your printer / scanner provided accompanying software that you can install and use to access your specific device’s various capabilities.
However, there is an app that’s preinstalled on all Mac computers called, Image Capture. Image Capture is made by Apple, and it will work with a wide range of printers, scanners, cameras, and more.
This is a step by step guide to scanning using the Image Capture app on your Mac.
- Open Image Capture: you’ll find it in the Applications folder.

In the Image Capture window, ensure to select your printer in the left hand column. In the screenshot below, my printer is under the Shared section. Your printer may be under Devices.

In the middle of the Image Capture window a preview will appear of what’s on the scan-bed of the printer.

For the purpose of this lesson, I’ve put a book on the scan-bed.

It’s usually easier to align a document with the edges of the scan-bed. If required, realign the document and, after doing so, be sure to click the Overview button (see the red box in the screenshot above) to ‘refresh’ the preview.
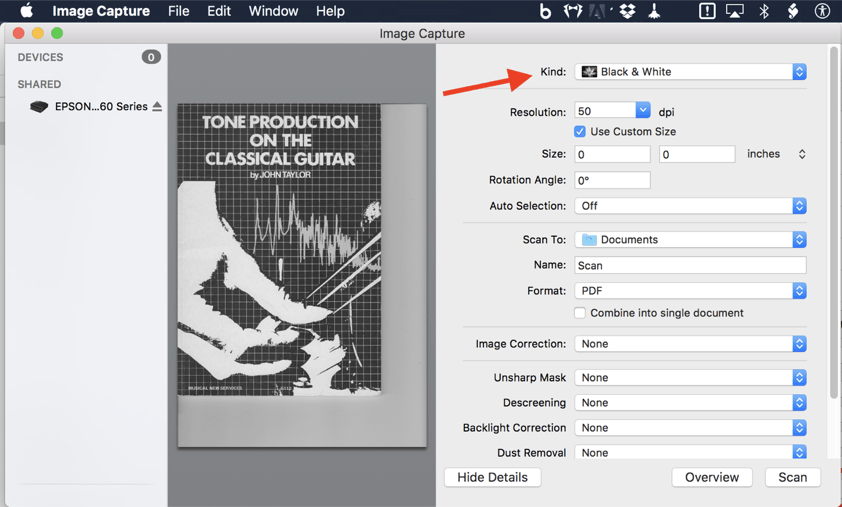
Now I have the book straightened / aligned. But it’s in black and white. So I need to change the settings, in the column on the right…..
In the below screenshot of those settings on the right I’ve already made the necessary changes so that, no matter what I’m scanning, they’ll do just fine. But there’s still a few things things I’ll need to check each time….

1: Scan settings: Kind
- For text documents, choose Black & White.
- For black and white artwork, choose Greyscale.
- For colour images and photos, choose Colour
2: Scan settings: Resolution
- For text documents, 100 DPI (Dots Per Inch) will be fine.
- For colour prints, 200-300 DPI
- Higher resolution equals a larger file size
3: Scan settings: Auto Selection
Personally I prefer Auto Selection to be turned Off. As such, I’ll need to select the area of the scan-bed that I want to scan.
4: Scan settings: Scan to…
Scan To: this is where the resulting scan will be saved to on your computer. The folder, Documents, will do just fine. (But feel free to experiment, perhaps scan straight to Mail..!)
5: Scan settings: Name
This is where you should give the resulting scan a unique, appropriate name of your choice.
6: Scan settings: Format
This is quite a broad subject, but some rules of thumb below:
- For text documents, letters… use PDF
- For images that are destined for the web or email, to be viewed on screens, use JPG
- For photos, or if it’s destined for print, use TIFF. These will result in the largest files.
Scan settings: Combine into single document
If you have a multipage letter or document then use the following settings:
- Format: PDF
- Combine into single document: Ticked
- Name: give your document an appropriate name
Note that, with those settings in place, each page that you scan will be added to the same PDF file until you change the text in Name.
Next, we need to tell the scanner the area of the scan-bed we want to scan: click and drag diagonally across the area you want to scan . A box with a dotted line will indicated the selected area.
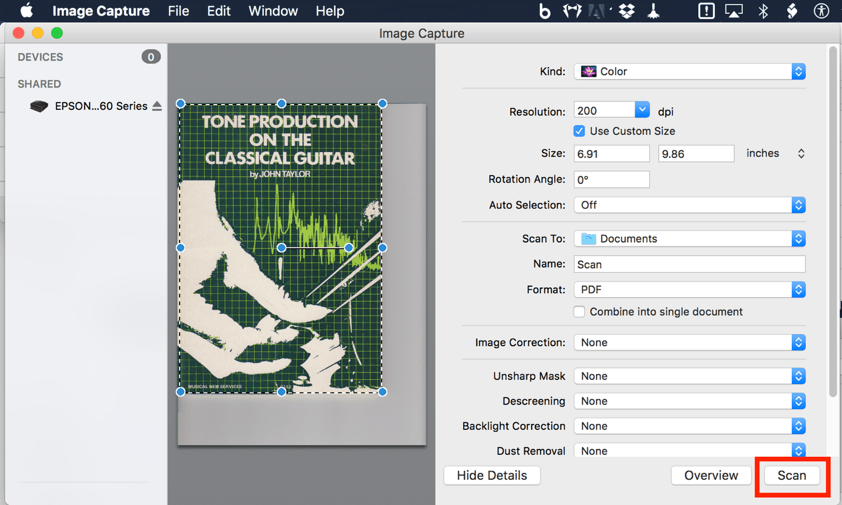
In the above screenshot, the blue dots indicate I’ve selected the area I want to scan. Now I’m ready to scan.
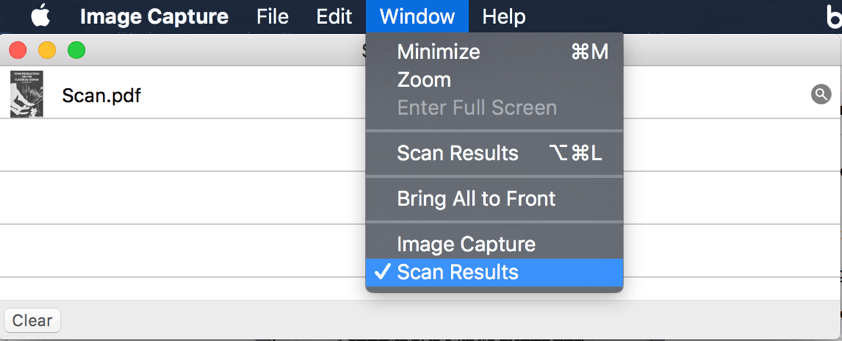
Click the Scan button in the bottom right hand corner (see screenshot above). Once it’s finished, a Scan Results window should appear (if not, go to the Window menu in the Menu Bar along the top ->Scan Results).
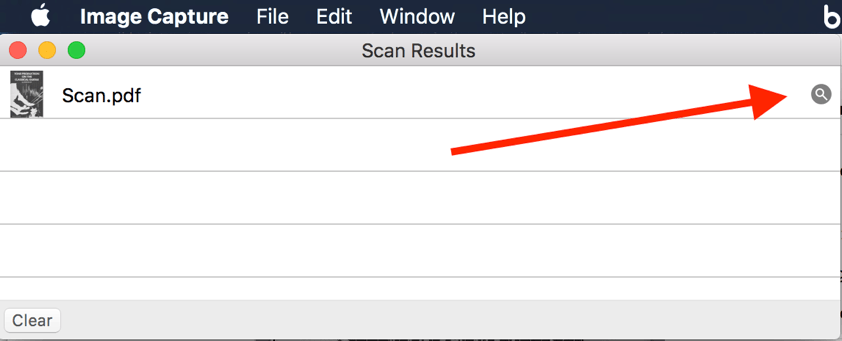
In order to locate your scanned file in Finder, click the Magnifying Glass icon on the right of the Scan Results window…
| Previous lesson: | Next lesson: |
| Navigating and selecting text | Backing up your computer using Time Machine |